Total Pageviews

Saturday, April 30, 2011

Tissue Paper Flowers for Mother’s Day

Need a pretty but inexpensive project for Mother’s Day? All you need is an old baby food jar, tissue paper, white glue and a couple of green pipe cleaners.
1. Tear blue tissue paper into small little strips. Make a 50/50 mix of white glue and water, brush on the outside of a baby food jar, and apply overlapping strips of tissue paper. Continue until the jar is covered. Brush a final layer of mixture over all to smooth the surface before it dries. Let dry.
2. My inspiration for the flowers comes from “Tissue Paper Flowers” by the editors of Klutz. Proportion of the flowers to the jar is important, so I’ve made a pattern that you can download HERE. You make a small green folded “nubs” on one ends of the pipecleaners, slide on two yellow circles, and two white star flowers. Use a small amount of clay or playdough inside the jar to support the stems.
Read more »

Friday, April 29, 2011

How to Draw a Peacock

Learning to draw radial symmetry is a CA Visual Arts standard, and is precisely what is called for in drawing this colorful peacock. I’m in love with this kinder’s drawing, in which she chose to use flowers to cap the feathers, instead of ovals.
1. Starting with a horizontal watercolor paper, students draw half a circle at the bottom.
2. A head with neck is added, and a beak and eye.
3. Oval feathers with lines are drawn at 9, 12, and 3 o’clock.
4. More feathers are added at 10, 11, 1 and 2 o’clock.
5. One more feather is added between each already drawn. A black permanent marker is used to trace all the pencil lines.
6. Crayon lines are added to the feathers. When complete, watercolor paint is used to color the peacock body and the background.
Thanks to Katharine, a kinder, who made this amazing peacock. I can’t get over her flower-topped feathers... nothing short of brilliant if you ask me.

Read more »

Thursday, April 28, 2011

Mother’s Day Art Project

I’ve used this card for kinders for several years and I'm still surprised at how nice they look, especially when colored with bright patterns.
1. Start with large white construction paper (12" x 18") and cut it in half to make panels of 6" x 18". Fold the panels into thirds to make a card that measures 6" x 6". Arrange folds so that the card makes a “Z”. Cut lots of posterboard “M” and “O” block letters for the students to trace. To save time, I left the “O” without the center cut out, and asked the students to just draw their own.
2. The students are to center the letters in each panel, trace with a pencil, and then with a black marker. The students colored in a different pattern in each letter, and then different colors for the background.
Read more »

Wednesday, April 27, 2011

Russian Cathedral Drawing

St. Basil’s is a famous cathedral in Russia, which was originally designed as a cluster of chapels. It’s unique architecture manages to look both old and new at the same time.
1. For this lesson, I led the students in setting up their basic building shapes, but then gave them THIS color photo for a guide. Starting with letter size paper, they drew a large rectangle in the middle. An “onion” shape was added on top.
2. A somewhat shorter rectangle is attached to the left and right. A curved top with ball is added.
3. Now the fun part – lots of curves and angles and swirls are added to decorate the entire building.
4. When the drawing is complete, all the lines are traced with a black Sharpie marker and the shapes are colored in with crayon.
Thanks so much to Keana A., a 1st grader who let me share her drawing. Can you tell she comes from an artistic family?
Read more »

Tuesday, April 26, 2011

Hand-Colored Mother’s Day Card

If you would like to make a homemade Mothers Day card, I’ve collected a bunch of decorative letters from clipartETC.com and arranged them on a jpeg file that you can just print and color.
1. Click on the image above to download my prepared jpeg file. Print on a sheet of heavy 8.5" x 11" paper with the landscape setting and all footers removed.
2. Use colored pencils to fill in the letters.
3. If you would like to make it into a card, tape to another paper and write a message inside.
Read more »

Sunday, April 24, 2011

Klimt’s Tree of Life Mural

Gustav Klimt was a Viennese painter who was perhaps best-known for his love of translucent, mosaic colors and forms, and curling background lines and patterns. His “Tree of Life” painting is a favorite of mine.
This template contains 30 pages and measures 48"x 48" when complete. Click HERE to see a preview of the blank template pages. You can purchase my pdf file with instructions and color guide for just $5. Click the “Add to Cart” button to make your payment via Paypal and receive immediate download instructions.

Add to Cart
Read more »

Friday, April 22, 2011

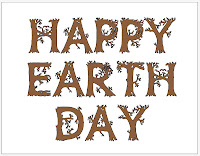
Happy Earth Day Coloring Page

I found this really great free font called Wild Wood at Font.DownloadAtoZ and made a quick coloring page for those still celebrating Earth Day today. I can’t promise that all the little twigs and leaves will be easy to color, but I'm sure it will look great when it’s done. You can download your blank template HERE. Have fun!
Read more »

Wednesday, April 20, 2011

Magazine Color Collage

Collage is a French word which means “glue.” The term was coined by Braque and Picasso in the beginning of the 20th century, when collage became a distinctive part of modern art.
1. I've found this to be a really good project for kinders and 1st graders. They enjoy the hunt for images, and benefit from some simple guidelines. Each student needs a couple of magazines, white paper, scissors and glue stick. They are to choose one color, and then collect as many different objects or swatches in that color as possible.
3. All of the images are glued onto the white paper, with the goal of overlapping and filling it up. This is really simple, but the fact that each picture will have a theme really unifies the images and can create some stunning artwork. Plus, everyone is getting lots of scissors cutting practice, without really thinking about it!
CA Visual Art Standard: Creative Expression, Kindergarten
2.3 Make a collage with cut or torn paper shapes/forms.
Read more »

Tuesday, April 19, 2011

Fruity People Collage

One CA Visual Art Standard centers around how to create feelings with one’s own artwork. This book “How Are You Peeling?” is full of some very creative photographs of fruit and vegetables, all made to reflect a wide variety of emotions. Reading it first helps to make connections that certain shapes can look a lot like faces, when using one’s imagination.
1. I’ve collected some photographs of fruit and vegetables, the low resolution type that are free for comp making. You can download the 2-page file HERE. Print as many copies as needed on inkjet paper.
2. I recommend that the students start by choosing a large shape to make the head, then the body, legs, arms, and finally details on top.
3. After all the body parts are collected and laid out, they are glued down with a glue stick.
CA Arts Standard: Creative Expression. 
2.5 Use lines in drawings and paintings to express feelings.
Read more »

Monday, April 18, 2011

Recycled Magazine Bowls

In honor of Earth Day, I’m having a Recycle Art Week at my school. These bowls are fun to make and truly about reusing that which just ends up in the trash.
1. Every student needs a 1" wide x 12" cardboard stick, scotch tape (preferably in a dispenser) and a magazine. To begin, students are to tear out magazine pages, taking care to choose those with the most color. The students then place the stick at a corner of a page and wrap the paper around it as shown in the diagram. Careful folding and creasing helps. When the page is completely wrapped around the stick, pull the stick out from one side. Tape the rolled paper corner down so it doesn't unwrap.
2. The first strip needs to be rolled up tightly, much like a tape measure is rolled. When finished, tape the end to itself so it doesn't come apart.
3. To continue, each new strip is attached with tape where the last one ended and wrapped to the growing roll until it is the size that is desired. When complete, hold the flat roll and shape it into a bowl. Apply a generous coat of Mod Podge on one side and let dry. Repeat for the remaining side.
Read more »

Sunday, April 17, 2011

CD Case Diorama

Here’s one more recycle project – using a CD case, cardboard boxes, and dried beans.
1. Collect clean cardboard packages, such as those used for cereal, crackers, pencils and markers. Open them up and cut out simple vehicle shapes, along with mountains, trees and sun.
2. Glue a small amount of dried beans to the inside of a clear CD case with white glue.
3. I prefer double-stick tape to attach the cardboard to the CD as it keeps the shapes lying flat.
Read more »

Egg Decorating from Macedonia

Lila Arsova, a teacher from Veles, Macedonija, recently sent me this wonderful series of photos showing how she decorated her eggs with some very colorful springtime napkins. I think her step-by-step pictures say it all, and cross any language barrier that might come between us. I personally have never seen any treatment quite like this, and am amazed at how beautiful the eggs are, not to mention the lovely documentation of them. Thank you Lila for taking time out to share your amazing creativity.
Note: I believe that the photos pretty clearly demonstrate the process, with the exception that Lila’s uses egg white to attach the napkin to the egg. What a great way to keep the process all natural.
Read more »

Saturday, April 16, 2011

Student Art from Arizona

This art comes from Arizona, where Elizabeth White taught her second graders how to make shades of red and blue, and then painted my Lincoln and Washington mural. I love the handpainted look of them, and would one day like to try this myself. Thank you for sharing Elizabeth, and please thank your talented students too!

Read more »

Recycled Mini Books

This is good for Earth Day or anytime you wish to make a recycling project. I’ve started to save cereal and pasta boxes all year round so that I have a good stash whenever I need one.
1. For a kindergarten class, I took clean cardboard boxes (like cereal or pasta) opened them up to lie flat, and cut them on the fold to a 3.5" wide x 5" tall rectangle using a paper cutter. Cut on an edge that already folds flat so that the “book” opens to a 7" x 5" size.
2. Take any old leftover paper blank paper, fold it and cut to the same dimension as the cardboard.
3. Place the blank paper inside the cardboard and staple at least twice on the outside of the spine so that the sharp points of the staples are hidden on the inside.
4. NOW, you can give these to kids and have them do any number of activities, including making "nonsense" collage drawings as shown. Older student such as 3rd to 5th could staple the books together. And if you are able to get one of those extended staplers, you can make books that are much larger.
Read more »

Thursday, April 14, 2011

Flower Watercolor Painting

Almost every elementary student can draw a flower, but are they aware of the many different shapes and sizes that exist? For this project, I found a lovely simple flower drawing to copy, originating from Geninne’s Art Blog.
1. I started by drawing a large collection of flowers on my board, based on the artwork from Geninne shown HERE. Students first drew the grass line in pencil and added at least three large flowers spaced evenly across the page. Thet then filled in the spaces with smaller flowers.
2. The students traced their artwork with a black permanent marker.
3. The flowers and grass were painted in with a variety of liquid watercolor paints. Dick Blick Watercolor paints are still my favorite.
4.  The sky was painted blue leaving a white halo around all of the flowers. The halo keeps the colors from running together while brightening up the painting as well.
Read more »

Wednesday, April 13, 2011

How to Draw a Hen and Chicks

I’m always looking for simple drawing ideas that are then easy to shade. This one works and makes a pretty picture too.
1. On a 9" x 12" piece of paper, the students draw a large circle for the hen body and then a small one for it’s head as shown.
2. The head is connected to the body with a neck, and a tail and legs are added.
3. Details are drawn on the hen head and a wing is drawn on the body. Two or more half-circles are added (wherever there is room) to make the chicks.
4. Heads and legs are added to the chicks.
5. All lines are traced with a black Sharpie and colored in with pastels. My favorite are the Portfolio® 24-pack oil pastels. Older students may add shadows by shading with a bit of gray.
Read more »

Tuesday, April 12, 2011

Maasai African Portraits

The Maasai people of African are located in Kenya. Their distinctive clothing and head dress make them among the most well known of all African tribes. A marker drawing on a piece of madras pattern tissue paper is one way to pay tribute to their fascinating culture.
1. After discussing a bit about the Maasai, I recommend that students first draw their portraits on a piece of drawing paper. Beginning with a large oval and neck, the stylized eyes, nose and mouth are added. Neck ware, headbands and feathers may be included too.
2. After the drawing is done, a matching size piece of madras pattern tissue paper is taped on the front, and the portrait lines are traced onto the tissue. Next the lines are all traced with Sharpie markers, some with fat and some with thin tip. I find that a variety of line weights add interest to artwork.
3. Lastly, the face is filled in with marker, leaving a bit of space around the eyebrow and nose line so they don’t disappear.
Read more »

Monday, April 11, 2011

Paper Mache Earth

The base for this paper mache globe is a beach ball. It gave the necessary round shape and was pretty sturdy to work with as well.
Session 1: I had my students place long strips of newspaper (about 10" x 3") covered in mache across a 14" beach ball. Large bowls were placed under the balls to keep them from rolling around. Some students covered the entire beach ball all in one layer, some got about 3/4 done. When drying, I had some issues with the beach balls deflating a bit, making them look lopsided. Not good. But I found that if I placed them in the sun for a few hours, the heat reinflated them. (The science lesson is a bonus.)
Session 2: Just like the first, with an emphasis on placing newspaper strips in the opposite direction to add strength.
Sessions 3: Students mached blank newsprint over the entire globe to cover all the type.
Session 4: I drew some very simple continent shapes on the board, and had the students paint in green the “land” on their globe. When complete, they filled in the rest with blue. My kids were so young I didn't bring up the issue of the north and south poles being white, but older students would probably like to do so. When the paint was dry, I sprayed the globes heavily with a spray varnish to add a little shine. All in all, a lot of fun and parents liked them as much as the kids.
Need a recipe for paper mache? Click here for the link to mine.
Read more »

Sunday, April 10, 2011

“Crafts for Kids” Giveaway

This craft magazine comes from Family Fun, and it’s full of down-home, do-it-yourself projects that are designed to keep kids creative and entertained at the same time. It’s 96 pages have quite a few ideas that even I haven’t seen before, and believe me, I’ve seen a few. To enter my giveaway, leave a comment and contact info by Sunday night 12pm midnight, PDT. Good luck everyone!
Read more »

Tropical Earth Day Mural

Earth Day is celebrated every year on April 22nd. I am happy to offer my new Tropical Earth Day Mural which includes two sizes: 12 pages (43"x 20") and 24 pages (64" x 30"). Click here to view the blank templates of each. 
You can purchase my pdf file with instructions for just $5. Click the “Add to Cart” button below to make your payment and receive immediate download instructions.

Add to Cart
Read more »

Friday, April 8, 2011

Homemade Watercolor Easter Card

Here’s an idea for a pretty Easter Card. Grid formats are fun to play with so feel free to make your own variation of this drawing.
1. I started by folding a piece of 8.5" x 11" watercolor paper in half. To make a quick grid without a lot of measuring, give each student a 1" square of thin cardboard. They are to place the square in each corner, and trace around it as shown in the first diagram.
2. With a ruler, the students then connect the lines to complete the border as shown.
3. Spring and easter details may be added.
4. After the drawing is complete with a pencil, the lines are traced with a black ballpoint pen and the shapes are painted with watercolor. I used Prismacolor watercolor pencils to make my sample.
Read more »

Thursday, April 7, 2011

Paper Mache Eggs, for Easter or Spring

I love springtime crafts that more or less imitate nature. I experimented with covering plastic fillable easter eggs with paper mache, and came up with this simple decoration.
1. I used the recipe that I posted about here, and covered a few plastic eggs with small bits of newspaper and mache. Several layers are best so that no plastic is peeking through. Let dry completely. Note: This worked well even with kinders as their small hands could really squeeze the eggs to smooth the paper.
2. Brush the eggs with one main light acrylic color and let it dry. Then use a small amount of darker paint for texture. Brush it on so that the eggs look to have 50/50 covering and let dry.
3. Rub on some gold tempera paint by hand to give the eggs a little shine.
4. Use a natural looking, bumpy yarn and unroll it into a small round pile for the nest. The result is a really nice centerpiece for any table.
Read more »

Wednesday, April 6, 2011

How to Draw a Truck

Every time I do a geometric drawing lesson like this, I am reminded that some students who yawn at the idea of drawing organic shapes, will work for hours on rectangular trucks or houses. It could be the sign of a future designer, which requires a more methodical set of drawing skills.
1. Working with letter size paper, I gave my kinders a Dixie cup to trace two wheels in the lower center of the paper. They drew the middle section of truck around them as shown in the diagram. 
2. The front and back of the truck are added.
3. The cab and window of the truck are drawn. A wavy or straight line is added for the road.
4. A profile of a driver is drawn, along with the back cab support.
5. Details or the truck and background complete the drawing. Students used a thin black marker to trace their drawing, and crayons to color it in.
Note: This lesson comes from Usborne’s “What Shall I Draw?” book, which has a lot of great drawing ideas.
Read more »

Tuesday, April 5, 2011

Rainbow Painting

This project offers students a chance to practice either wet-on-wet or dry brush watercolor painting. I used both for my sample.
1. I had the students paint without the aid of a pencil outline. They began by painting the grass across the bottom of the sheet.
2. Students who preferred the wet-on-wet rainbow painted the red arc, then orange, yellow, green, blue and purple all just barely overlapping to let colors bleed a bit.
3. Students who opted for the dry brush rainbow painted every other arc, starting with red, a space, then yellow, a space, then blue. When dry, they filled in the spaces with orange and green and added the purple. This spacing allows the colors to dry a bit to avoid bleeding.
4. They finished the sky with a very watery blue.

Note: My favorite paint of the moment are Dick Blick Liquid Watercolors. The colors just are too vibrant for me to pass up.
Read more »

Sunday, April 3, 2011

Lettering 101

This is one of the lettering styles that is included in Cyndi Hansen’s “Letter Better” book, and I tried it just last week in a class. It has just three simple steps that even kinders can easily remember.
1. Stick letters are written in pencil.
2. The lines are traced with a black marker, and all end points are “capped” with black circles.
3. The letters are outlined, preferable with thinner marker, and filled in with colored pencils. Who needs a computer when you can make your own hip and colorful font?
Read more »