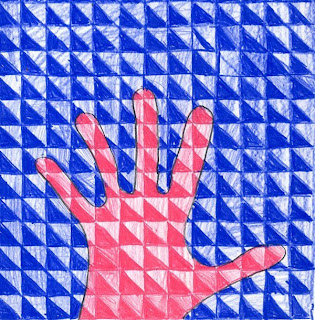
 My experience in graphic arts enables me make up my own templates for new art projects. In this case I added a diagonal line to my graph, but alternating squares will work fine too.
1. Give each student a square paper that has the (lightly) printed 5/8" grid, with a diagonal line slicing through each box. Have them trace their hand in the middle of the paper, in pencil.
2. The students are to pick just two pencil crayons for their picture. In the example shown, the student chose pink and blue. She colored everything inside the hand pink, but changed the coloring density on the top and bottom triangles to make one light and one dark. If you have the students start by making just one two-tone box, and then repeat that pattern to the edge of the hand, it may be the best way for them to understand the pattern they are to make.
3. After the hand is filled in, the student should take the remaining pencil and fill in the background, following the pattern they began on the inside. For instance, if the bottom left corner is the darkest in the hand, the bottom left corner should also be the darkest outside the hand. Proceed until the paper is filled in. Note: This may take a couple of classes to finish but I think it's worth it.


 8:14 PM
 keprok


0 comments:
Post a Comment