 This week I had a lot of students finish their paper mache masks in my first after-school class. I love the big, bold results! One of the joys of working with little kids is watching how they can paint without hesitation. No regrets, no worries... they just paint.
 Note: There is a fair amount of prep work for this, but it was all made from recycled products so it was cheap. I started by cutting the largest matching ovals I could from the two flat sides of a pizza box, approx: 17" x 14". This large size is important as it allows little ones to paint with big fat brushes and still get a clear face. Using box cutters, I cut out the eyes from one oval, traced them onto the other and cut again. You will need some kind of spacers to glue the two cardboard faces together, with about an inch of space between. I stacked about 5 layers of cardboard strips together on the chin, cheeks and forehead and glued them together with a tacky white glue. Let dry. With 2" wide masking tape, run a strip all around the outside to seal the edge. With thinner tape, also tape closed the inside of the eyes. This has to be repeated for each student.
1. Week One: Have the students paper mache the large areas of the face with 5" squares of paper towel. They should try to get near all the edges to make what looks like a generally white face.
2. Week Two: The students now work with narrower strips of paper towel, about 2" wide, and concentrate on wrapping the strips around the outside edge and the inside of the eyes. The mask should now be completely covered with towel, and there should be no tape showing anywhere.
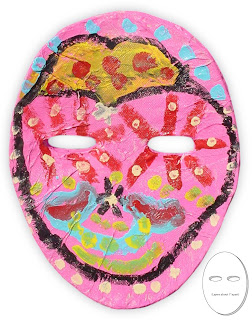
3. Week Three: I had a lot of premixed acrylic paint from Michael’s, their store brand actually, and first limited the kids to one background color of paint. When the face was completely covered, they were allowed to choose their own colors to paint details. Let dry. Spray with a glossy spray sealer when complete.
This mask was made by a talented first grader, Sophie Haaland. Thanks Sophie!


 9:03 PM
 keprok
 This is a little twist (literally) on the usual snowman drawing. It asks students to think about circles can become spheres and have a 3-dimensional shape to them.


